on
使用 OpenIddict 建立一個支援 Client Credentials Grant 的 Authentication Server 來保護你的 Web API - Part 1
本篇內容主要講解如何使用 OpenIddict 來建立一個支援 Client Credentials Grant 的 Authentication Server 來保護你的 Web API。
內容將會分成兩個部分,第一部分包含方案說明,以及建立 Authentication Server 專案,第二部分則會建立一個 Resource Server (Web API) 專案,及一個 Console App 作為 Client。
方案說明
我們這裡會建立一個方案,裡面包含了 Auth Server, Resource Server 及 Client App,作法如下:
- 建立一個 Auth Server
- Auth Server 需支援 client credentials grant
- Auth Server 需要定義一個 client
- client 可以使用 client credentials grant
- Auth Server 需要有一個 introspection endpoint,供 Resource Server 呼叫,作為驗證 access token 用
- 建立一個 Resource Server (Web API)
- 包含一個 endpoint - WeatherForecast (Web API 專案的內建範例)
- 需要 Auth Server 發出的 access token 才能存取
- 建立一個 Console App 做為 Client
- Client App 會向 Auth Server 取得 access token
- Client App 會呼叫 Resource Server 取得資料
Auth Server
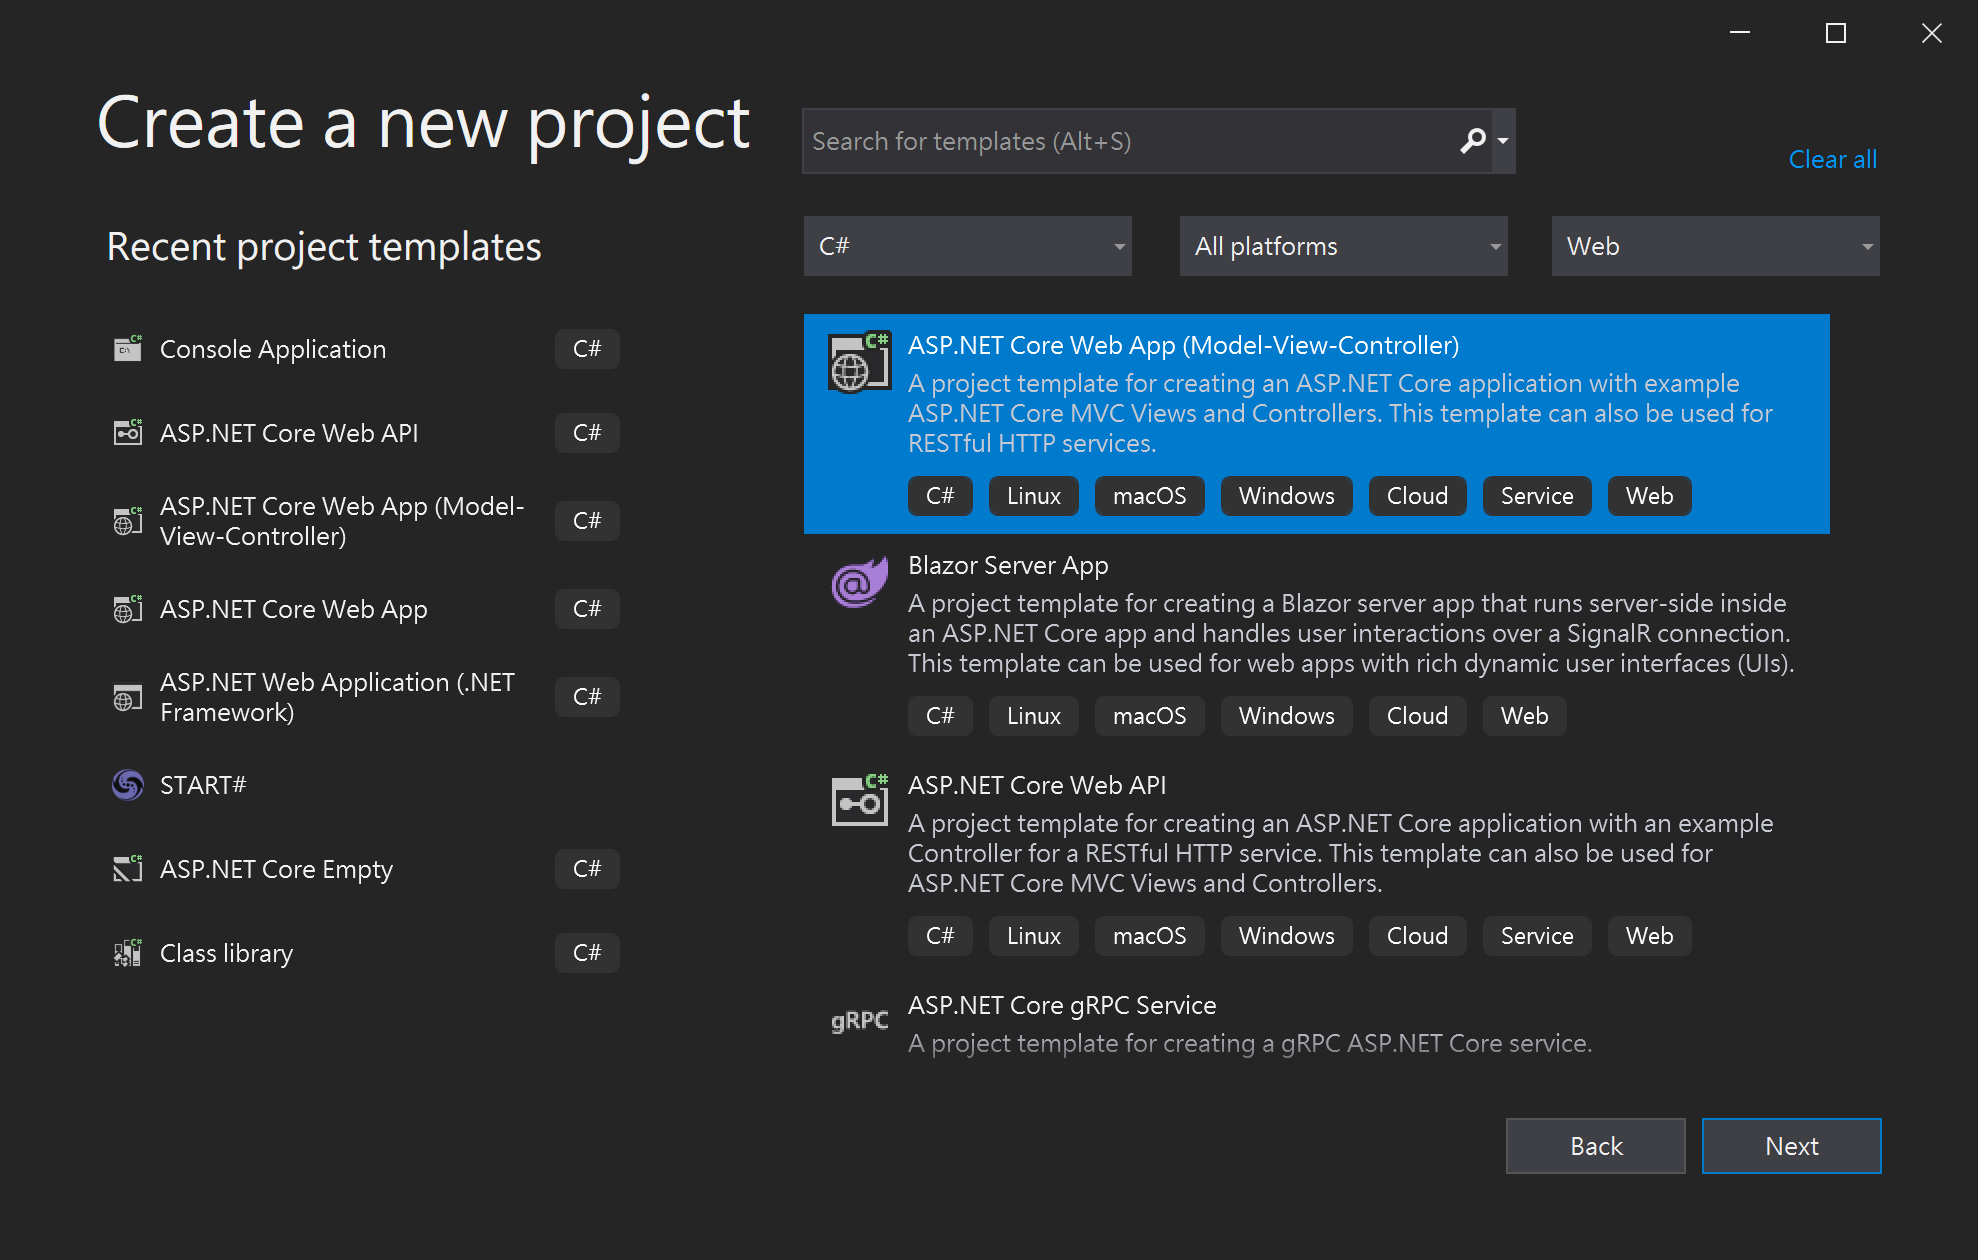
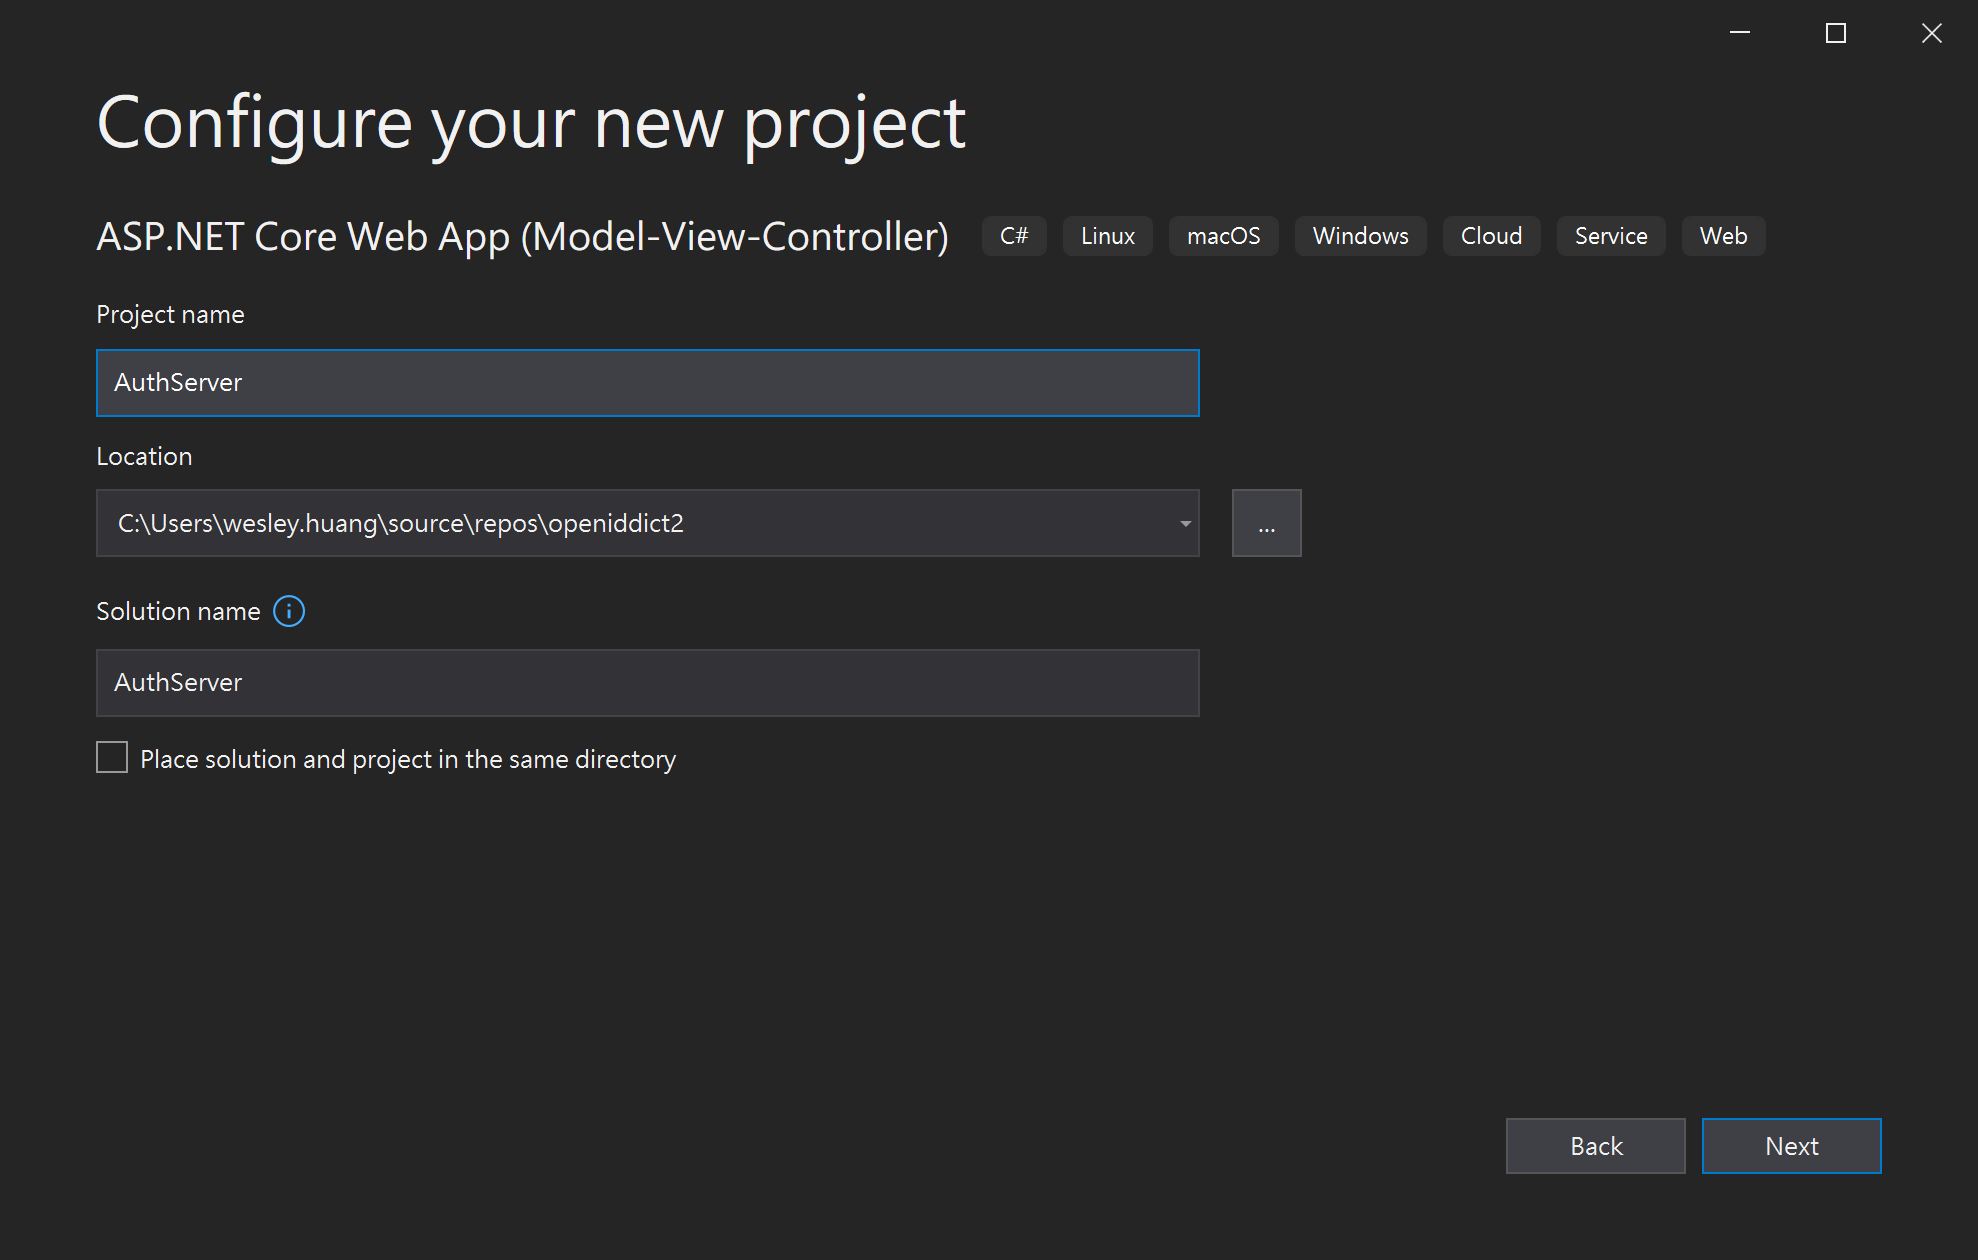
1. 開新專案
首先,先開一個新的 ASP.NET Core MVC 專案,專案名稱為 AuthServer,Authentication Type 選擇 None。

2. 安裝 OpenIddict 套件
這個步驟需要安裝四個 NuGet 套件,分別為:
- Microsoft.EntityFrameworkCore.SqlServer 5.0.8
- Microsoft.EntityFrameworkCore.Tools 5.0.8
- OpenIddict.AspNetCore 3.1.0
- OpenIddict.EntityFrameworkCore 3.1.0
版本編號為撰文當下的最新版本
NuGet package 安裝方式相信大家都很熟悉了,就不另外講解
3. 建立 DbContext
在專案底下建立一個名為 Data 的資料夾,在資料夾中建立一個 AppDbContext.cs,內容如下:
using Microsoft.EntityFrameworkCore;

namespace AuthServer.Data
{
    public class AppDbContext : DbContext
    {
        public AppDbContext(DbContextOptions<AppDbContext> options)
            : base(options)
        {

        }
    }
}
4. 加入連線字串
開啟 appsettings.json ,加入 SQL 連線字串,這裡用 LocalDB 為範例。
{
    "ConnectionStrings": {
        "DefaultConnection": "Server=(localdb)\\mssqllocaldb;Database=AuthServer;Trusted_Connection=True;MultipleActiveResultSets=true"
    },
    // ...
}
5. 修改 Startup.cs
這一步,我們要在 Startup.cs 中加入 DbContext 以及 OpenIddict 的相關設定。
開啟 Startup.cs 並做以下修改。
using AuthServer.Data;
using Microsoft.EntityFrameworkCore;
public void ConfigureServices(IServiceCollection services)
{
    services.AddDbContext<AppDbContext>(options =>
    {
        options.UseSqlServer(Configuration.GetConnectionString("DefaultConnection"));
        options.UseOpenIddict();
    });

    //OpenIddict
    services.AddOpenIddict()
        .AddCore(options =>
        {
            options.UseEntityFrameworkCore()
                .UseDbContext<AppDbContext>();
        })
        .AddServer(options =>
        {
            // 允許 auth server 支援 client credentials grant
            options.AllowClientCredentialsFlow();

            options
                // 設定取得 access token 的 endpoint
                .SetTokenEndpointUris("/connect/token")
                // 設定 introspection endpoint
                .SetIntrospectionEndpointUris("/connect/introspect")
                ;

            options
                // 產生開發用的加密金鑰,production 建議用存在本機的 X.509 certificates
                .AddEphemeralEncryptionKey()
                .AddEphemeralSigningKey()
                // 停用 access token 加密,production 不建議使用
                .DisableAccessTokenEncryption()
                ;

            options
                .UseAspNetCore()
                .EnableTokenEndpointPassthrough()
                ;

        });

    services.AddControllersWithViews();
}
接著在 Configure 中,app.UseRouting() 後面加入下面程式片段
app.UseAuthentication();
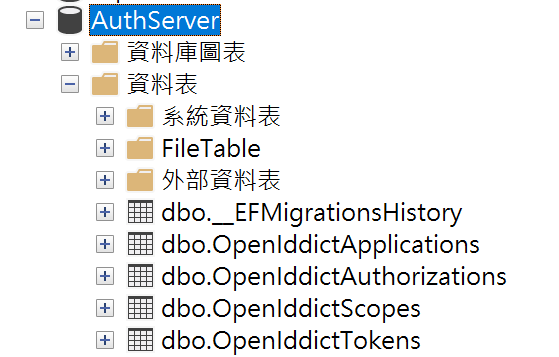
6. EF Migration
點選 Tools > NuGet Package Manager > Package Manager Console,接著在 Package Manager Console 中輸入以下指令:
Add-Migration AddOpenIddictTables
Update-Database
完成之後,可以使用 SSMS 開啟資料庫,應該可以看到已經建立好四個 OpenIddict 的資料表。
7. 加入 Token Endpoint
在 Startup.cs 中,我們有設定一個取得 access token 的 endpoint,現在要將它實作出來。
在 Controllers 資料夾中,新增 AuthorizationController.cs,程式碼如下:
using Microsoft.AspNetCore;
using Microsoft.AspNetCore.Mvc;
using Microsoft.IdentityModel.Tokens;
using OpenIddict.Abstractions;
using OpenIddict.Server.AspNetCore;
using System;
using System.Security.Claims;
using System.Threading.Tasks;
using static OpenIddict.Abstractions.OpenIddictConstants;

namespace AuthServer.Controllers
{
    public class AuthorizationController : Controller
    {
        private readonly IOpenIddictApplicationManager _applicationManager;

        public AuthorizationController(
            IOpenIddictApplicationManager applicationManager
            )
        {
            _applicationManager = applicationManager;
        }

        [HttpPost("~/connect/token"), Produces("application/json")]
        public async Task<IActionResult> Exchange()
        {
            var request = HttpContext.GetOpenIddictServerRequest() ??
                throw new InvalidOperationException("The OpenID Connect request cannot be retrieved.");

            if (request.IsClientCredentialsGrantType())
            {
                var application = await _applicationManager.FindByClientIdAsync(request.ClientId);
                if (application == null)
                {
                    throw new InvalidOperationException("The application details cannot be found in the database.");
                }

                var identity = new ClaimsIdentity(TokenValidationParameters.DefaultAuthenticationType, Claims.Name, Claims.Role);

                // 將 claim (sub=clientid) 加到 access token, id_token
                identity.AddClaim(Claims.Subject, await _applicationManager.GetClientIdAsync(application),
                    Destinations.AccessToken, Destinations.IdentityToken);

                // 將 claim (name=client display name) 加到 access token, id_token
                identity.AddClaim(Claims.Name, await _applicationManager.GetDisplayNameAsync(application),
                    Destinations.AccessToken, Destinations.IdentityToken);

                var principal = new ClaimsPrincipal(identity);

                return SignIn(principal, OpenIddictServerAspNetCoreDefaults.AuthenticationScheme);
            }

            throw new InvalidOperationException("The specified grant type is not supported.");
        }
    }
}
8. 加入測試用的 Client 設定
由於我們並沒有後台可以管理 Client 應用程式,所以我們需要透過程式碼來加入相關的設定。
新增一個 TestClient.cs,並加入以下程式碼:
using AuthServer.Data;
using Microsoft.Extensions.DependencyInjection;
using Microsoft.Extensions.Hosting;
using OpenIddict.Abstractions;
using System;
using System.Threading;
using System.Threading.Tasks;
using static OpenIddict.Abstractions.OpenIddictConstants;

namespace AuthServer
{
    public class TestClient : IHostedService
    {
        private readonly IServiceProvider _serviceProvider;

        public TestClient(IServiceProvider serviceProvider)
        {
            _serviceProvider = serviceProvider;
        }

        public async Task StartAsync(CancellationToken cancellationToken)
        {
            using var scope = _serviceProvider.CreateScope();

            var context = scope.ServiceProvider.GetRequiredService<AppDbContext>();
            await context.Database.EnsureCreatedAsync(cancellationToken);

            var manager = scope.ServiceProvider.GetRequiredService<IOpenIddictApplicationManager>();
            var scopeManager = scope.ServiceProvider.GetRequiredService<IOpenIddictScopeManager>();

            if (await manager.FindByClientIdAsync("my-console-app", cancellationToken) is null)
            {
                await manager.CreateAsync(new OpenIddictApplicationDescriptor
                {
                    // Client Id
                    ClientId = "my-console-app",
                    // Client Secret
                    ClientSecret = "388D45FA-B36B-4988-BA59-B187D329C207",
                    DisplayName = "My Console App",
                    Permissions =
                    {
                        // 允許使用 token endpoint
                        Permissions.Endpoints.Token,
                        // 允許使用 client credentials flow
                        Permissions.GrantTypes.ClientCredentials,
                    }
                }, cancellationToken);
            }

            //introspection client
            if (await manager.FindByClientIdAsync("resource_server") == null)
            {
                var descriptor = new OpenIddictApplicationDescriptor
                {
                    ClientId = "resource_server",
                    ClientSecret = "846B62D0-DEF9-4215-A99D-86E6B8DAB342",
                    DisplayName = "Resource Server Introspection",
                    Permissions =
                    {
                        Permissions.Endpoints.Introspection
                    }
                };

                await manager.CreateAsync(descriptor);
            }
        }

        public Task StopAsync(CancellationToken cancellationToken) => Task.CompletedTask;
    }
}
上面的程式中,我們一共建立了兩個 ClientId。
一個是 my-console-app,是給我們的 Client 使用,從 permission 設定中可以看到,這個 Client 允許使用 token endpoint 取得 access token,且允許使用的認證流程為 client credentials grant。
另一個則是 resource_server,是給的 resource server 驗證 access token 使用,所以它的 permission 就只有 introspection endpoint。當 client 拿著 access token 向 resource server 要求存取資料時,resource server 就會透過這組 clientid 來向 auth server 要求驗證 access token 的有效性。
再完成 TestClient.cs 之後,需要將其加入 Startup.cs,這樣在網站執行後,就可以自動在資料庫中建立 client 的設定。
請將下面程式片段加在 Startup.cs 中的 ConfigureServices 的最後。
services.AddHostedService<TestClient>();
完成之後,執行程式,檢查 OpenIddictApplications 這個資料表,應該可以看到兩個 Applications 的設定。

9. 測試 Authentication Server
目前我們已經完成 AuthServer,我們可以用 Rest Client for Visual Studio Code,做一下簡單的測試
Request
POST https://localhost:44337/connect/token HTTP/1.1
Content-Type: application/x-www-form-urlencoded

grant_type=client_credentials
&client_id=my-console-app
&client_secret=388D45FA-B36B-4988-BA59-B187D329C207
Response
{
  "access_token": "eyJhbGciOiJSUzI1NiIsImtpZCI6IlRYWkc2RDc3SkU4NTNDVElTWEc5R0pPWUxaR0lGR....",
  "token_type": "Bearer",
  "expires_in": 3599
}
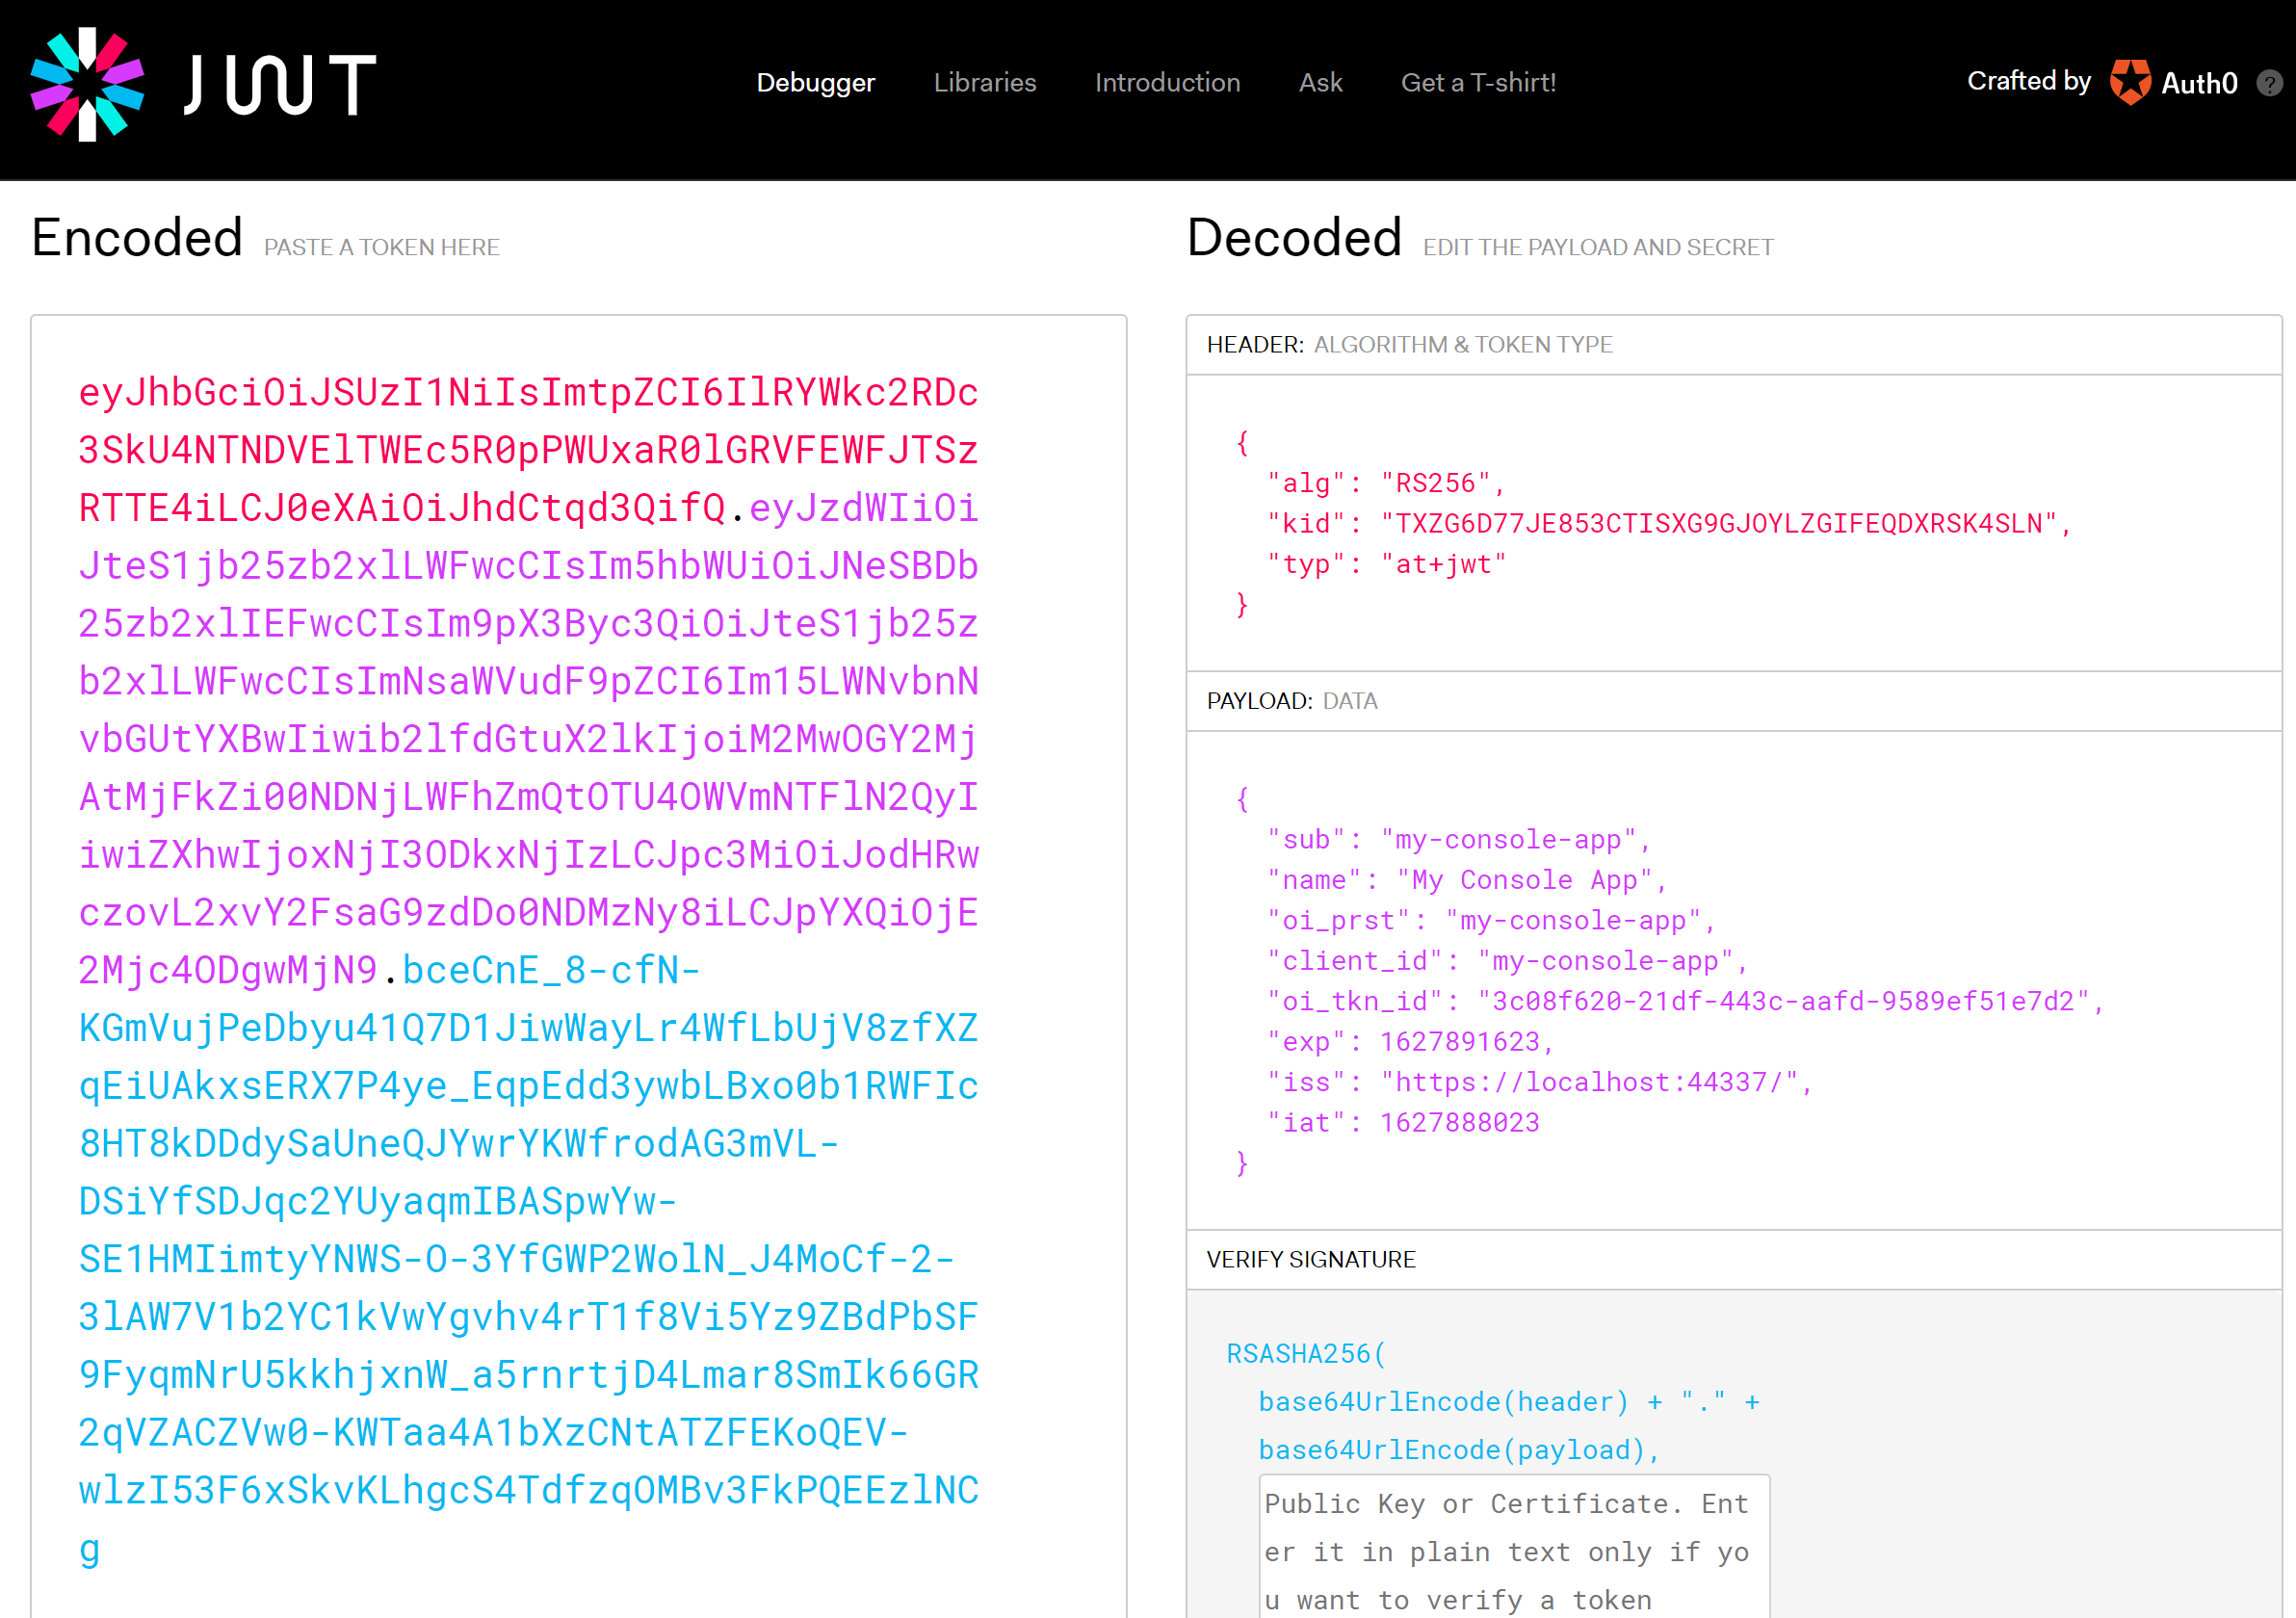
你可以將 access_token 複製下來,並利用 jwt.io,來觀察 access_token 所包含的資訊
結論
在這個部分,我們已經將 AuthServer 完成了,接下來第二部分,將會繼續完成 Resource Server (Web API) 及 Client 的 Console 應用程式。